Woody 1.0
Installation
1. In your Admin panel, go to Appearance > Themes and click the Add New button.
2. Click Upload and Choose File, then select the theme’s .zip file. Click Install Now.
3. Click Activate to use your new theme right away.
or
1. Unzip .zip file and FTP it to your hosting server under wp-content/themes of your Wordpres installation directory.
Theme`s Requirements
- Default Pages and Menu is created after Woody Theme activation. Please do not delete them or change their slug as they are required to run the Theme correctly, they are: “About Me” page (slug ‘niteo-about’) and “Woody Primary” Menu.
Theme Setup
1. In your Admin panel, go to Appearance enter the Customize section.
2. In Customizer go to Site Builder, Fonts & Colors and enable the sections you want to display on Mainpage.
3. In Customizer go to Menus and select “Woody Primary” and select is as a Primary Menu.
Theme Customization
1. In Customizer > Site Identity section > change “Site Title”, “Site Tagline”, “Upload Custom Logo” and “Site Icon”
2. In Customizer > Header Image section > upload “Header Image” or use “Youtube Video” as a header video. Also you can apply special effects like “blur” and “dotted pattern” to your Image.
3. In Customizer > Site Builder, Fonts & Colors section > select which sections to display on page (Portfolio, About, Instagram, Contact sections) and choose their order by drag and drop the Items. Customize Theme`s colors and Fonts (any Google Font).
4. In Customizer > About Me section > upload your custom Avatar, set your Info and Signature.
5. In Customizer > Portfolio section > Customize how many of Columns to display Portfolio and it`s Padding. Also you can disable/enable to display Portfolio Filters.
6. In Customizer > Instagram Section > provide your Instagram Access Token to display your Instagram feed (latest 6 photos).
8. In Customizer > Contact section > edit your Contact Details, Social Icons, enable/disable Google Map and set custom Copyright.
Portfolio Setup
1. Go to WP Admin > Portfolios and create New Portfolio. The “Title” of Portfolio is also name of “filter” on Website Portfolio section.
2. Insert your Photos into Portfolio. We recommend to use “large” size to achieve best quality of thumbnails on website.
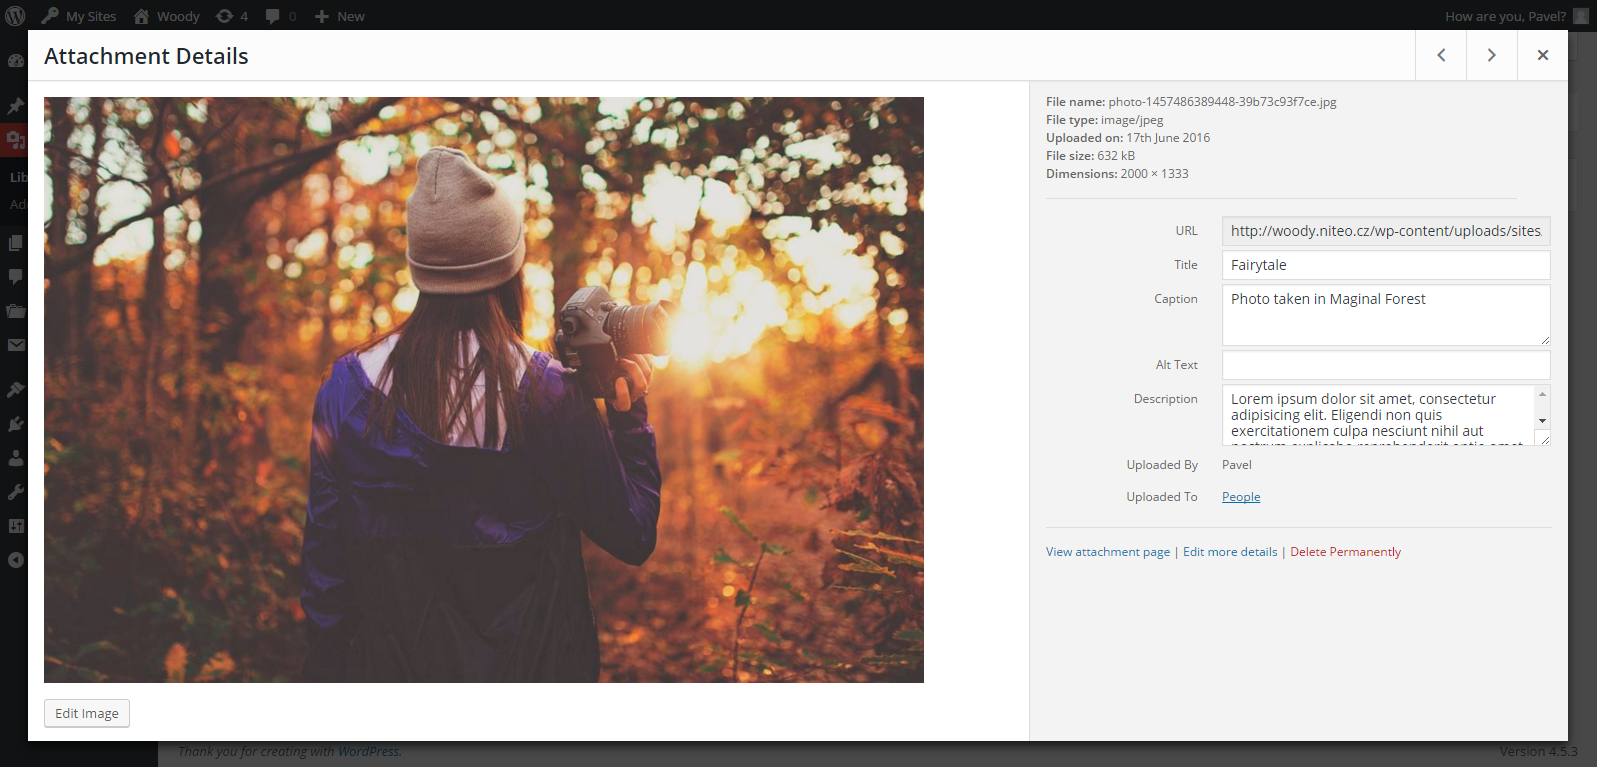
3. Edit your Photo`s in Media Library to display correctly Title, Short Description and Long description. See Screenshot.
AddCustom Section
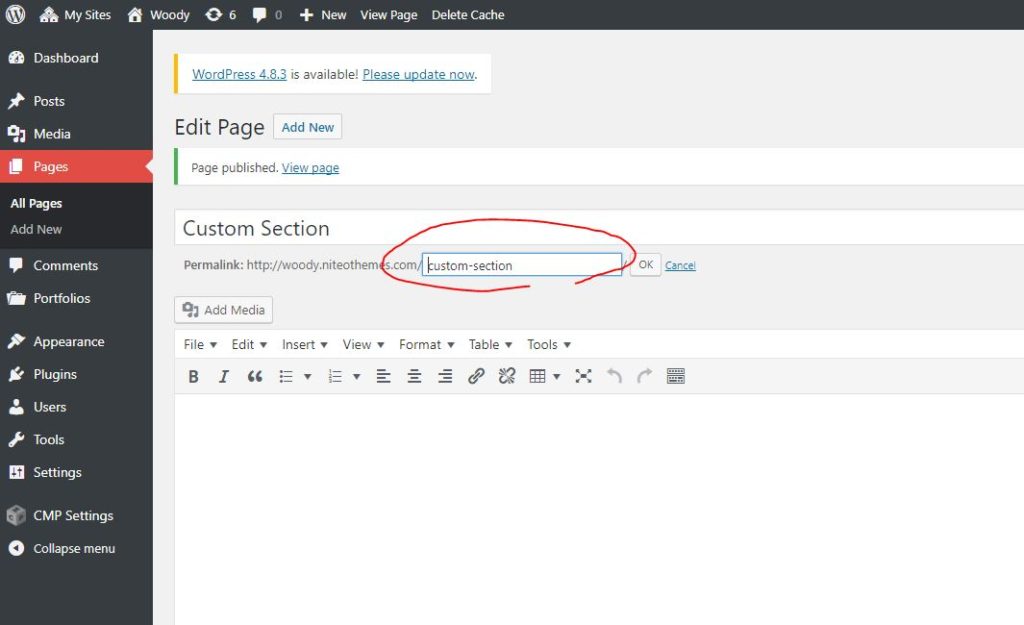
1. Go to WP Admin > Pages and create New Page and remember it`s slug(for example custom-section)
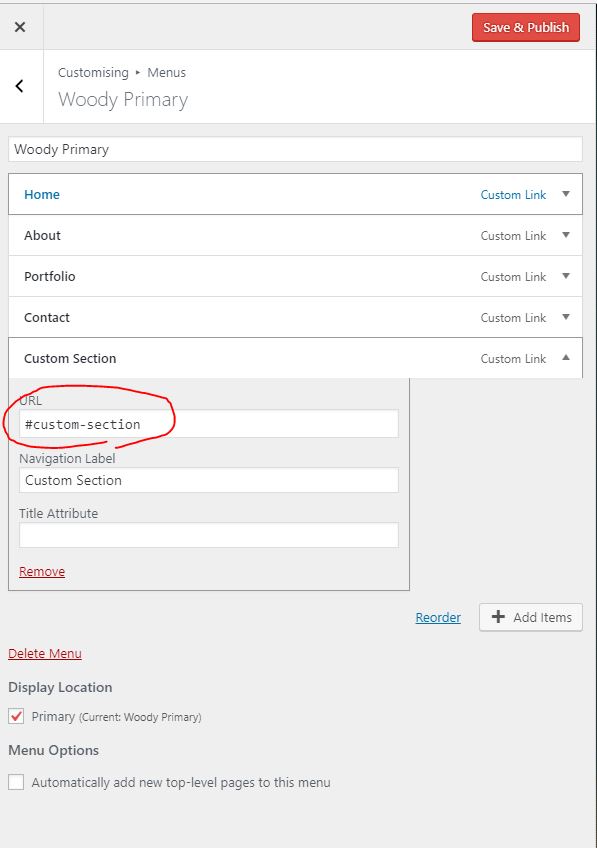
2. Go to Customizer > Menus > Add Item and choose Custom Link. Set URL to #custom-section(depends on your page slug) and Link Text as you like to Menu Item appear in Navigation Menu.
That`s all. Thanks for looking, your Niteo.